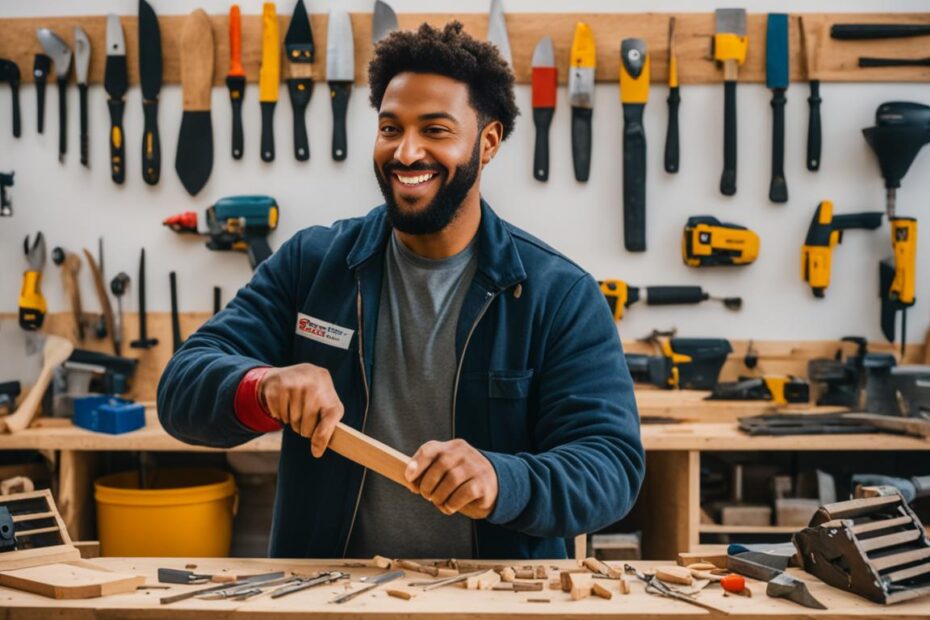
Are you a beginner looking to dive into the world of woodworking? Or maybe you're searching for some easy projects to sharpen your skills? Look no further! In this article, we'll introduce you to a range of woodworking projects that are perfect for beginners. These projects require minimal tools and are designed to be quick and easy, allowing you to create functional and beautiful pieces in no time.

Whether you're interested in making a wooden chopping board, creating a shoe storage booster stool, or building magazine storage containers, we've got you covered. Each project comes with detailed step-by-step instructions to help you along the way.
Key Takeaways:
- Woodworking projects are a great way for beginners to get started and hone their skills.
- These projects require minimal tools and can be completed in a short amount of time.
- From a wooden chopping board to a shoe storage booster stool, there are a variety of projects to choose from.
- Each project includes step-by-step instructions to guide you through the process.
- Don't be afraid to unleash your creativity and tackle these easy woodworking projects!
Make a Wooden Chopping Board and Serving Tray
Create a stylish wooden chopping board and serving tray with this easy beginner woodworking project. By following these simple steps, you can craft a functional and beautiful kitchen accessory that will impress your guests.
To start, gather your materials. You will need a piece of high-quality wood, such as maple or walnut, with dimensions suitable for your desired chopping board and serving tray sizes. Additionally, gather water-resistant wood glue, clamps, a ruler or thin board for scribing arcs, and sandpaper.
Pro tip: Consider using water-resistant wood glue to ensure the durability and longevity of your wooden chopping board.
Begin by cutting your wood into the desired dimensions for your chopping board and serving tray using a saw. Remember to wear appropriate safety gear, such as goggles and gloves, when operating power tools.
Pro tip: If you're a beginner, start with a simple rectangular shape for both the chopping board and serving tray, as it will be easier to handle.
Next, it's time to assemble the pieces using a glue-up technique. Lay the cut pieces on a flat surface, ensuring that the edges fit snugly together. Apply a thin layer of water-resistant wood glue to the mating surfaces, then clamp the pieces securely.
Pro tip: Before applying the glue, use a simple way to dry-fit the pieces to ensure a proper fit and alignment.
While the glue dries, take the opportunity to scribe arcs on the sides of the wooden chopping board and serving tray using a ruler or thin board as a guide. This will add an elegant touch to your finished project.

Quote: “The beauty of woodworking lies in its ability to combine function and aesthetics. With a few basic skills and some quality materials, you can create a stunning wooden chopping board and serving tray.” – Woodworking Enthusiast
After the glue has fully cured, remove the clamps and begin the sanding process. Start with coarse-grit sandpaper to remove any excess glue and rough edges. Gradually switch to finer-grit sandpaper to achieve a smooth and polished finish.
Pro tip: Minimize sanding by ensuring a tight glue-up. This will save you time and effort in the finishing process.
To add the final touch, apply a food-safe finish, such as mineral oil or beeswax, to protect the wood and enhance its natural beauty. Follow the manufacturer's instructions for application and drying times.
Once your wooden chopping board and serving tray are complete, you can proudly display them in your kitchen or use them to serve delicious meals to family and friends. This easy beginner woodworking project is a great way to practice basic woodworking skills and create a functional piece that will last for years to come.
Keep Organized With This Shoe Storage Booster Stool
Are you tired of tripping over shoes in your entryway? Keep your space tidy and organized with a shoe storage booster stool. This versatile piece of furniture not only provides a place to sit while putting on or taking off your shoes but also offers storage for your footwear collection.

To build your own shoe storage booster stool, you will need the following materials:
- A 4 ft. x 4 ft. sheet of 3/4-in. plywood
- Wood glue
- Finish nails
Start by cutting the plywood pieces according to the provided illustration. Then, assemble the stool by nailing the joints together using wood glue and finish nails. The sturdy construction ensures that your stool can withstand everyday use and the weight of your shoes.
This shoe storage booster stool is not only a practical solution for small spaces but also doubles as a step stool. Reach high shelves easily and safely by using the stool as a stable platform. Say goodbye to wobbly chairs or unsteady step stools!
If you prefer a wall-mounted solution, you can also create wall-mounted shoe organizers. Install storage shelves on your wall to neatly display and store your shoes without taking up valuable floor space.
Stay organized and maintain a clutter-free entryway with this shoe storage booster stool. It's a simple and functional woodworking project that adds both style and functionality to your home.
Make Magazine Storage Containers
Organize your magazines and important papers with ease using these simple wood storage bins. With just one 2 ft. x 4 ft. sheet of 1/4-in. plywood and two 6-ft. long 1x4s, you can create four stylish magazine storage containers. Using a jigsaw or band saw, cut the plywood into the desired shapes, ensuring precise measurements for a clean finish. These storage bins are not only practical but also add a touch of sophistication to your living space, keeping your favorite magazines easily accessible.

When assembling the bins, make sure to apply a strong wood glue to secure the joints firmly. The 1/4-in. plywood provides durability while the 1x4s act as sturdy support. Once the bins are assembled and the glue has dried, you can personalize them with your choice of paint or wood stain to match your decor.
These magazine storage containers are perfect for organizing your reading materials in a neat and attractive way. Place them on a bookshelf, coffee table, or any other designated area to keep your magazines organized and easily accessible. Alternatively, use them to store other important papers or documents, ensuring everything is in one place and ready for reference.
“These wood storage bins are a practical and stylish solution for organizing magazines and important papers in your home.”
With just a few simple materials and tools such as 1/4-in. plywood, 1x4s, a jigsaw or band saw, and wood glue, you can create your very own magazine storage containers. Say goodbye to cluttered stacks of magazines and hello to a beautifully organized space.
Materials
| Materials | Quantity |
|---|---|
| 1/4-in. plywood sheet | 1 |
| 6-ft. long 1x4s | 2 |
| Wood glue | As needed |
Tools
- Jigsaw or band saw
- Measuring tape
- Sandpaper
- Paint or wood stain
- Paintbrush or rag
Follow these step-by-step instructions to create your own magazine storage containers:
- Measure and mark the desired dimensions for the storage bins on the 1/4-in. plywood sheet.
- Using a jigsaw or band saw, carefully cut out the shapes for the bins.
- Apply wood glue to the edges of the plywood pieces and join them together to form the bins. Use clamps to hold the pieces in place while the glue dries.
- Once the glue has dried, sand the edges of the bins to achieve a smooth finish.
- Apply your choice of paint or wood stain to the bins, allowing them to dry completely.
- Your magazine storage containers are now ready to be used. Arrange them in your desired location and enjoy having your magazines neatly organized.
By following these simple steps, you can create stylish and functional magazine storage containers to keep your reading materials in order. These bins not only provide a practical storage solution but also add an aesthetic touch to your living space.
Create a Sleek and Simple Coat and Hat Rack
Clear up entryway clutter by building a sleek and simple coat and hat rack. Our coat and hat rack project is an easy and practical solution for entryway organization. With just a 6 ft. 1×4 board and some coat hooks, you can create a personalized storage solution that keeps your coats and hats easily accessible.
To get started, follow these simple steps:
- Measure and cut the 1×4 board to fit your space. You can easily find a 6 ft. board at most hardware stores.
- Choose your preferred finish for the board. You can paint it to match your decor or stain it for a natural look.
- Attach the coat hooks evenly along the board. Make sure to leave enough space between the hooks for your coats and hats.
- Mount the rack securely to the wall using appropriate hardware and follow all safety guidelines.
Hardware stores and online retailers offer a wide variety of coat hooks in different styles and colors, including unusual coat hooks that can add visual interest to your entryway. Whether you prefer a modern, rustic, or vintage look, you'll find plenty of options to choose from.
Here's a visual representation of the coat and hat rack project:
| Materials | Tools |
|---|---|
| – 6 ft. 1×4 board – Coat hooks – Paint or stain | – Tape measure – Saw – Screwdriver – Level – Mounting hardware |
By creating a coat and hat rack, you can achieve both functionality and style in your entryway. Say goodbye to cluttered floors and hello to organized outerwear. Start your DIY project today!
Build a Spice Rack
Keep your favorite spices organized and easily accessible with a homemade spice rack. This project requires an 11-1/2 in. and a 7-1/4 in. diameter wood discs, lazy Susan hardware, dowels for legs and handle, drill bits, and a wood ball or knob. Follow the step-by-step instructions to create indentations for the spice bottles and assemble the rack using dowels. Customize the finish to match your kitchen cabinets.
Materials needed:
- 11-1/2 in. diameter wood disc
- 7-1/4 in. diameter wood disc
- Lazy Susan hardware
- Dowels for legs and handle
- Drill bits
- Wood ball or knob
Step-by-step instructions:
- Start by securing the 11-1/2 in. wood disc as the base of the spice rack.
- Drill holes in the smaller wood disc to create indentations for the spice bottles.
- Attach the lazy Susan hardware to the base wood disc to allow for easy rotation.
- Drill holes in the larger wood disc to attach the dowels for the legs and handle.
- Insert the dowels into the holes and secure them with wood glue.
- Attach the wood ball or knob to the top of the handle dowel.
- Customize the finish of the spice rack to match your kitchen cabinets.
- Place the spice bottles in the indentations on the smaller wood disc.
Create a beautiful and functional spice rack that will add organization and convenience to your kitchen cabinet.
Make This Pantry Storage Saver
Maximize your pantry storage space with our homemade pantry storage saver. This project is perfect for organizing spices and other small items, ensuring that your pantry stays neat and clutter-free.
To create this pantry storage saver, you'll need 1/4-in. and 1/2-in. plywood scraps. These materials are readily available at most home improvement stores. By using plywood scraps, you can save money while still creating a durable and functional storage solution.
Follow our detailed tutorial to build a single drawer spice rack that fits neatly into your pantry drawer. If you need extra storage space, you can also opt for the two-tier drawer spice rack. The choice is yours!
This project requires minimal tools and can be completed in just one hour. It's a quick and easy way to make the most of your pantry space and keep everything organized. Say goodbye to rummaging through cluttered shelves and hello to a neatly arranged pantry.
Check out the step-by-step instructions in the following table to get started:
| Materials | Tools |
|---|---|
|
|
Follow the detailed instructions in the following table to build your own pantry storage saver:
| Step | Instructions |
|---|---|
| 1 | Measure and cut the plywood scraps into the desired dimensions for your drawer spice rack. |
| 2 | Assemble the plywood pieces using wood glue and nails. Make sure the joints are secure and the rack is stable. |
| 3 | Place the pantry storage saver in your drawer and arrange your spices and small items in an organized manner. |
By following these instructions, you'll have a functional and efficient pantry storage saver that will help you maximize your pantry space. Say goodbye to clutter and hello to a well-organized pantry!
Now, take a look at the image below to visualize the pantry storage saver:
With our pantry storage saver, you can create a clean and organized pantry that makes finding spices and small items a breeze. Start building your own pantry storage saver today and enjoy a well-organized and efficient kitchen!
Conclusion
Whether you're a beginner or an experienced DIYer, our collection of woodworking projects offers something for everyone. These easy and beginner-friendly projects are a great way to enhance your woodworking skills while creating functional and beautiful pieces.
From building a spice rack to crafting a coat and hat rack, these projects require minimal tools and can be completed in a short amount of time. With step-by-step instructions and detailed plans, you can confidently embark on your woodworking journey and bring your creative ideas to life.
Explore our woodworking plans and unleash your creativity with these DIY wood projects. Not only will you enjoy the process of building something with your own hands, but you'll also have the satisfaction of owning a unique and personalized piece for your home.
So, grab your tools and get started on these quick and easy woodworking projects. Whether you're looking to organize your space or add a touch of style, these projects are sure to inspire you and leave you with a sense of accomplishment.
FAQ
What are some quick and easy woodworking projects for beginners?
Some quick and easy woodworking projects for beginners include building a wooden chopping board and serving tray, creating a shoe storage booster stool, making magazine storage containers, constructing a coat and hat rack, building a spice rack, and making a pantry storage saver.
What tools do I need for these beginner woodworking projects?
The tools you will need for these beginner woodworking projects include a jigsaw or band saw, wood glue, finish nails, a drill, a miter saw or circular saw, a tape measure, and a sander or sandpaper.
Where can I find step-by-step instructions for these woodworking projects?
You can find step-by-step instructions for these woodworking projects in online tutorials, woodworking books, and DIY websites. Some websites also provide free plans and templates for these projects.
How long does it take to complete these woodworking projects?
The time it takes to complete these woodworking projects depends on the complexity of the project and your level of skill. Some projects can be completed in a few hours, while others may take a few days.
Can I customize these woodworking projects to fit my space?
Yes, you can customize these woodworking projects to fit your space. You can adjust the dimensions, colors, and finishes to match your personal style and the decor of your home.
