If you're a DIY enthusiast looking for easy woodwork projects to inspire your creativity and build your skills, you're in the right place. In this article, we have compiled a list of beginner-friendly woodworking projects that require minimal tools and experience. Whether you're interested in making a wooden chopping board, a shoe storage booster stool, or a spice rack, we have you covered with simple plans and step-by-step instructions. Get ready to embark on your woodworking journey with these easy and rewarding projects.

Key Takeaways:
- Easy woodwork projects are perfect for DIY enthusiasts of all skill levels.
- These projects require minimal tools and experience, making them ideal for beginners.
- From wooden chopping boards to spice racks, there's a project for everyone's interest.
- Simple plans and step-by-step instructions make these projects easy to follow and complete.
- Start your woodworking journey today and discover the joy of creating with your own two hands.
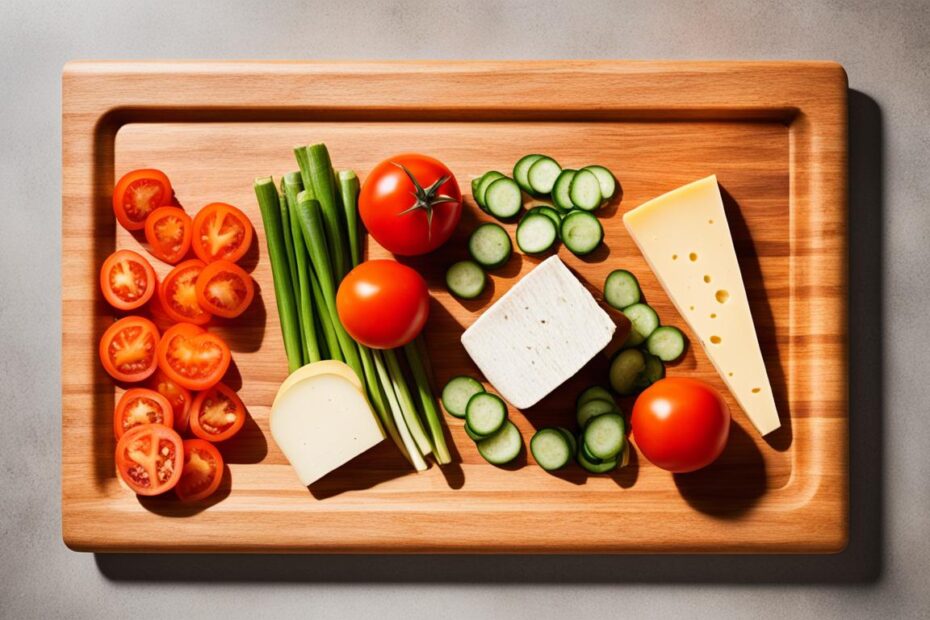
Make a Wooden Chopping Board and Serving Tray
Create a stylish and functional wooden chopping board and serving tray with this easy project. You'll learn how to dry-fit the parts, scribe the arc, and glue everything together. Use water-resistant wood glue and keep the board away from the dishwasher to ensure its durability. Additionally, learn the importance of keeping the boards even during glue-up to minimize sanding later. This project is perfect for beginner woodworkers and makes a great addition to any kitchen.
When it comes to kitchen essentials, a wooden chopping board is a must-have. Whether you're chopping vegetables or slicing meat, a sturdy and reliable surface is essential for safe and efficient food preparation. With this woodworking project, you can create your own personalized chopping board and serving tray that will not only add a touch of elegance to your kitchen but also serve as a versatile tool.
Start by selecting a high-quality wood that is suitable for cutting and food contact. Popular choices include hardwoods like maple, walnut, and cherry. Ensure that the wood is properly seasoned and free from knots or defects that could impact its structural integrity.
Begin the project by cutting the board to your desired size and shape. You can use a table saw or a handheld circular saw for this task. Remember to wear safety goggles and use a push stick or a guide rail to ensure a straight and accurate cut.
“A wooden chopping board and serving tray is a versatile addition to any kitchen, allowing you to prepare and present meals with style and ease. This woodworking project is perfect for beginners, offering a rewarding experience and a practical piece that you can enjoy for years to come.”
Next, sand the edges and surfaces of the board to create a smooth and splinter-free finish. Start with a coarse-grit sandpaper and gradually work your way up to a finer grit for a polished result. Be sure to sand in the direction of the wood grain to prevent scratching or damaging the surface.
Once the board is sanded, you can customize it further by adding decorative features such as a rounded edge or engraved initials. These personal touches will make your chopping board unique and showcase your woodworking skills.
“By creating your own wooden chopping board and serving tray, you can not only save money but also have full control over the design and quality of the final product. It's a great way to express your creativity and develop your woodworking skills.”
After finalizing the design, it's time to assemble the board. Apply a generous amount of water-resistant wood glue to the edges and carefully join the pieces together. Use clamps to secure the boards and allow the glue to dry completely. It's important to keep the boards even during the glue-up process to minimize the need for excessive sanding later on.

Once the glue has fully cured, remove the clamps and inspect the board for any imperfections. If necessary, use a random orbital sander or hand sanding to smooth out any uneven areas or glue residue. Finish the board by applying a food-safe finish such as mineral oil. This will enhance the natural beauty of the wood and provide added protection against moisture.
“With its timeless beauty and practicality, a wooden chopping board and serving tray is a staple in any kitchen. By making your own, you can create a piece that reflects your personal style and craftsmanship.”
In conclusion, building a wooden chopping board and serving tray is a fulfilling and beginner-friendly woodworking project. It allows you to create a functional and visually appealing piece for your kitchen while honing your woodworking skills. Whether you're a seasoned woodworker or just starting out, this project is a great way to explore the world of woodworking and add a touch of handmade charm to your culinary space.
Build a Shoe Storage Booster Stool
Maximize your closet space with this shoe storage booster stool that doubles as a step to reach high shelves. To build this handy stool, all you need is a sheet of plywood, wood glue, and a few finish nails. Cut the plywood pieces according to the provided illustration and assemble them with wood glue and nails. You can also build wall-mounted shoe organizers if you're short on floor space. These projects are perfect for beginners and offer practical solutions for organizing your footwear.
If you're tired of tripping over shoes in your closet or struggling to reach those top shelves, this DIY shoe storage booster stool is the perfect solution. Not only does it provide a convenient place to store your shoes, but it also serves as a stool to help you reach higher spaces.
To build the shoe storage booster stool, start by gathering your materials. You'll need:
- A sheet of plywood
- Wood glue
- A few finish nails
- Illustration for cutting plywood pieces
Once you have your materials ready, follow these steps:
- Cut the plywood pieces according to the provided illustration.
- Assemble the pieces together using wood glue and finish nails.
- Allow the glue to dry completely before using the stool.
With just a few simple steps, you can create a functional and space-saving shoe storage booster stool. Place it in your closet or entryway for easy access to your favorite pairs of shoes. No more searching for matching shoes or struggling to reach the top shelf!
If you have limited floor space in your closet, consider building wall-mounted shoe organizers instead. These organizers can be customized to fit your space and provide a stylish and efficient way to store your shoes.
Get started on your DIY shoe organizer project today and enjoy a clutter-free and organized closet.
Construct a Wooden Bench for Extra Seating
Need some extra seating in a hurry? This simple wooden bench, based on a classic design, can be constructed in just a couple of hours. Even if you're a novice woodworker, you can easily build this bench with two boards and some screws. The cost is minimal, and the result is a functional and attractive seating option for your home or outdoor space. Give it a try and see how rewarding it can be to create your own piece of furniture.

Creating a wooden bench not only provides a practical seating solution but also allows you to showcase your woodworking skills. With a few basic tools and materials, you can bring this project to life in no time. Whether you need a cozy spot on your porch, a versatile seat in your backyard, or an additional piece for your indoor living area, a wooden bench is a versatile and stylish choice.
Simple Design, Easy Assembly
The beauty of this wooden bench lies in its simplicity. The design incorporates clean lines and a sturdy structure, making it suitable for beginners and experienced woodworkers alike. The assembly process is straightforward and requires minimal tools and materials. By following the step-by-step instructions, you'll have a functional bench ready to use in no time.
Even if you're new to woodworking, don't be intimidated by this project. With a little patience and attention to detail, you'll be able to create a beautiful and functional wooden bench.
Materials and Tools
To construct this wooden bench, you'll need the following materials:
- Two 2×6 boards (6 feet long)
- Wood screws
- Wood glue
- Drill
- Drill bits
- Screwdriver
- Measuring tape
- Saw
- Sandpaper
Ensure that the boards are made of a durable and weather-resistant wood, such as cedar or pressure-treated lumber, especially if the bench will be placed outdoors.
Step-by-Step Instructions
Follow these simple steps to construct your wooden bench:
- Measure and cut the boards: Start by measuring and cutting two equal lengths from the 2×6 boards for the seat and two additional lengths for the legs. The measurements will depend on your desired bench size.
- Sand the edges: Use sandpaper to smoothen any rough edges on the boards.
- Assemble the seat: Place the two seat boards parallel to each other, ensuring they are evenly spaced. Attach them together using wood screws.
- Attach the legs: Position the legs at each end of the seat boards. Use wood screws to secure them firmly in place.
- Sand and finish: Give the entire bench a final sanding to ensure a smooth surface. Apply a protective finish, such as wood stain or outdoor sealant, to enhance its durability and appearance.
Once the finish has dried, your wooden bench is ready to be enjoyed! Place it in your desired location and admire the beauty of your handcrafted creation.
Not only does this wooden bench provide extra seating, but it also adds a touch of warmth and character to any space. With a few hours of work and some basic tools, you can create a functional and stylish piece that will surely impress your friends and family.
Make Magazine Storage Containers
If you're looking for a way to organize your magazines and important papers, these simple wood storage bins are the perfect solution. With just a sheet of plywood and a couple of 1×4 boards, you can build four bins that will keep your favorite publications at your fingertips.
Use a jigsaw or band saw to cut the wood easily and assemble the bins with wood glue. Say goodbye to the towering pile of magazines and hello to organized storage containers.

If you have a growing collection of magazines, newspapers, or important papers that need a designated space, our magazine storage containers are a stylish and practical solution. These containers are not only functional but also add a touch of elegance to your living space.
To build these magazine storage containers, you'll need:
- A sheet of plywood
- A couple of 1×4 boards
- A jigsaw or band saw
- Wood glue
Here's a step-by-step guide to building your magazine storage containers:
- Start by measuring and cutting the plywood into the desired dimensions for your bins.
- Next, cut the 1×4 boards to create the sides and bottom of the bins.
- Using wood glue, attach the sides and bottom of the bins to the plywood pieces.
- Allow the wood glue to dry before sanding the bins for a smooth finish.
- Finally, apply a finish or stain of your choice to protect the wood and enhance its natural beauty.
These magazine storage containers are not only practical but also provide a sophisticated way to showcase and organize your reading materials. Keep your favorite magazines neatly arranged, making it easy to find and retrieve them whenever you want.
By building these magazine storage containers, you'll create a designated space for your publications, keeping your living area clean and clutter-free. Get started on this simple and rewarding woodworking project today.
Create a Sleek and Simple Coat and Hat Rack
Clear up your entryway clutter with a sleek and simple coat and hat rack that you can build in about an hour. All you need is a 1×4 board, coat hooks, and some screws. Cut the board to fit your space, paint or stain it to suit your style, and then screw the hooks to the wall. With a wide range of hook styles and colors available, you can customize this project to match your decor. Say goodbye to messy coats and hats and hello to an organized and stylish entryway.
Here's what you'll need:
| Materials | Tools |
|---|---|
|
|
Build a Spice Rack for Kitchen Organization
Keep your favorite spices organized and easily accessible with this DIY spice rack. This project is quick and fun to make, and it fits inside a standard kitchen cabinet. All you need is some wood discs, lazy Susan hardware, dowels, and drill bits. Follow the provided instructions to create the bottle indents, drill the holes, and assemble the rack. With this spice rack, you'll never have to search for your go-to seasonings again. Enjoy a well-organized and efficient kitchen workspace.
When it comes to cooking, having your spices neatly organized can save valuable time and effort. No more rummaging through cluttered cabinets or spice drawers searching for the right ingredient. With a spice rack, you can easily see and reach your spices, making cooking a breeze.
Benefits of a Spice Rack
A spice rack offers numerous benefits for kitchen organization:
- Maximize space: A spice rack optimizes cabinet space, allowing you to make the most of your kitchen storage.
- Easy accessibility: With spices arranged in a rack, you can quickly locate and retrieve the ones you need.
- Prevent clutter: Say goodbye to a jumble of spice bottles and packets.
- Preserve freshness: A spice rack keeps your spices upright, preventing them from clumping or losing flavor.
- Decorative display: A well-designed spice rack can add a touch of charm to your kitchen decor.
If you're ready to improve your kitchen organization, let's dive into how to build a spice rack.
Materials Needed
Before you begin, gather the following materials:
- Wood discs
- Lazy Susan hardware
- Dowels
- Drill bits
These materials are readily available at your local home improvement store or online.
Step-by-Step Instructions
Follow these simple steps to create your DIY spice rack:
- Start by measuring the interior dimensions of your kitchen cabinet to determine the size of your spice rack.
- Cut the wood discs to the desired size. These will serve as the shelves for your spice containers.
- Using the drill bits, create indentations on the wood discs to hold the spice bottles securely in place.
- Next, assemble the lazy Susan hardware according to the manufacturer's instructions.
- Attach the wood discs to the lazy Susan hardware, ensuring they are evenly spaced.
- Insert the dowels into the drilled holes on the wood discs. These dowels will prevent the spice bottles from sliding off the shelves.
- Finally, install the spice rack inside your kitchen cabinet and admire your beautifully organized spices.
With your new spice rack, you'll have a convenient and efficient way to store and access your favorite seasonings. No more fumbling through cluttered cabinets or digging through drawers. Every spice will have its rightful place, making cooking a joyous experience.
Conclusion
Woodworking is a rewarding hobby that allows you to unleash your creativity and create functional pieces for your home. These easy woodwork projects are perfect for beginners, providing a great starting point to hone your woodworking skills and build confidence in crafting with wood. With just basic tools and a little bit of imagination, you can transform simple materials into beautiful and useful objects.
Whether you're interested in making a chopping board, shoe storage stool, or spice rack, these beginner-friendly DIY woodworking ideas offer a range of options to suit your interests and needs. Each project comes with step-by-step instructions, making it easy for you to follow along and achieve successful results.
So why wait? Start your woodworking journey today and discover the joy of working with your hands. These projects are not only a great way to enhance your home decor and organization, but they also provide a sense of fulfillment and pride in creating something from scratch. Don't be intimidated by woodworking – with these easy woodwork projects, you'll be amazed at what you can accomplish.
FAQ
Are these projects suitable for beginners?
Yes, all of these projects are beginner-friendly and can be completed with minimal tools and experience.
What materials do I need for these projects?
The materials needed for each project are listed in the accompanying instructions. Generally, you'll need basic woodworking materials such as wood, glue, nails, screws, and any specific components mentioned in the plans.
How long does it take to complete each project?
The time required to complete each project will vary depending on your skill level and the complexity of the design. However, all of these projects can be completed within a few hours or over a weekend.
Do I need expensive tools to complete these projects?
No, you don't need expensive tools. Basic woodworking tools such as a saw, drill, and measuring tools should be sufficient for most of these projects. However, it's always a good idea to have a well-equipped toolbox to make the process easier.
Can I customize the designs to fit my space or style?
Absolutely! These projects serve as a starting point, and you can customize them to fit your specific needs and preferences. Feel free to adjust the dimensions, finishes, and details to match your space and personal style.
