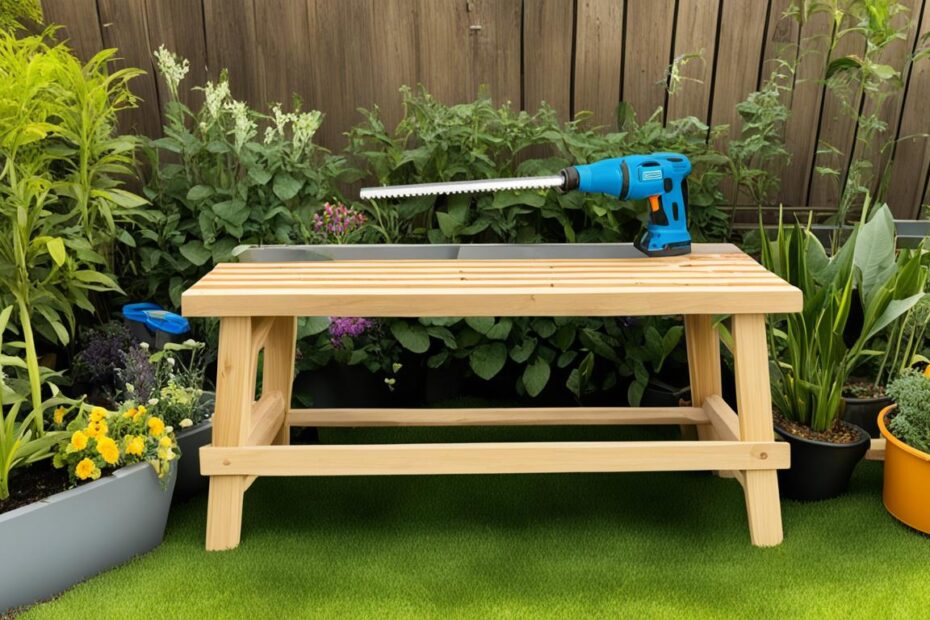
Woodworking can be an intimidating hobby for beginners, but there are plenty of easy projects that can help build confidence and skills. Whether you're looking to create functional furniture or decorative pieces, these beginner woodworking projects require minimal tools and experience. Here are some ideas to get you started.

Key Takeaways:
- Beginner woodworking projects are a great way to build confidence and skills.
- These projects require minimal tools and experience.
- Woodworking can involve creating functional furniture or decorative pieces.
- Start with simple projects like a wooden chopping board or a spice rack.
- Online resources provide woodworking plans and tutorials for beginners.
Build a Wooden Chopping Board and Serving Tray
Looking for a beginner-friendly woodworking project that combines both functionality and style? Consider building a wooden chopping board and serving tray. This project is not only practical for everyday use in the kitchen but also allows you to showcase your woodworking skills.
Making a wooden chopping board and serving tray involves simple cuts, gluing, and sanding, making it an ideal project for beginners with minimal woodworking experience. With just a few common tools like a saw, sandpaper, and wood glue, you can create a beautiful and functional piece that will impress your family and friends.
Materials and Tools Needed
- Wooden board (preferably hardwood like maple or walnut)
- Sandpaper (medium and fine grit)
- Wood glue
- Clamps
- Saw (preferably a circular saw or jigsaw)
- Router (optional, for adding decorative edges)
- Food-safe finish (like mineral oil or beeswax)
Step-by-Step Instructions
- Select a wooden board of your choice. It should be thick enough to withstand cutting and chopping.
- Measure and mark the desired dimensions for your chopping board and serving tray.
- Using a saw, carefully cut along the marked lines to shape your board and tray.
- Sand the surfaces and edges of the board and tray using medium grit sandpaper to remove any roughness.
- Switch to a fine grit sandpaper and sand the surfaces and edges again for a smooth finish.
- If desired, use a router to add decorative edges to your board and tray.
- Apply wood glue to the edges of the tray and attach it to the board.
- Secure the pieces together using clamps and allow the glue to dry completely.
- Remove the clamps and sand any excess glue until the joints are seamless.
- Apply a food-safe finish to protect the wood and enhance its natural beauty.
Remember, safety should always be a priority when working with tools and machinery. Don't forget to wear protective gear like safety goggles and gloves, and follow all manufacturer instructions for the tools and materials you use. Happy woodworking!
Keep Organized With This Shoe Storage Booster Stool
When it comes to keeping your space organized, having efficient storage solutions is key. That's why we recommend the shoe storage booster stool as a beginner-friendly woodworking project. Not only does it provide a designated place for your shoes, but it also serves as a handy step stool.
To bring this project to life, you'll need a few basic materials:
- Plywood
- Wood glue
- Finish nails
With these supplies in hand, you can create a functional and stylish piece of furniture that serves multiple purposes.
There are numerous woodworking plans available online for this project, providing step-by-step instructions and detailed diagrams to guide you along the way. Whether you prefer a minimalistic design or something more intricate, you can find a plan that suits your preferences and skill level.
Not only will building a shoe storage booster stool help you enhance your woodworking skills, but it will also add organization and functionality to your home. It's a practical solution for keeping your shoes neatly stored while ensuring easy access whenever you need them.


Why Choose a Shoe Storage Booster Stool?
The shoe storage booster stool offers several advantages:
- Space-saving: By combining a shoe storage solution with a step stool, you save valuable floor space, especially in smaller homes or entryways.
- Convenience: With your shoes neatly organized and readily accessible, you'll no longer have to search for the right pair or worry about cluttered floors.
- Multi-functionality: In addition to storing shoes, the booster stool doubles as a step stool, making it easier to reach high shelves or access items in upper cabinets.
- Customizability: With a wide range of woodworking plans available, you can choose the aesthetic and design that best matches your personal style and home decor.
By completing this woodworking project, you'll not only enjoy the satisfaction of building something with your own hands but also reap the benefits of a functional and organized space. Plus, it's a project that can be easily accomplished, even for those new to woodworking.
Make Magazine Storage Containers
If you're looking for a way to organize your magazines and important papers, making magazine storage containers can be a great beginner woodworking project. With just a sheet of plywood, some 1×4 boards, and basic cutting tools like a jigsaw or band saw, you can create simple wood storage bins. These bins can be easily customized to fit your specific storage needs.
Magazines and papers tend to pile up quickly, creating clutter in your living space. Keeping them organized not only makes your home look neater but also allows for easy access when you need to find a specific article or document. Instead of storing them haphazardly in stacks or drawers, wooden magazine storage containers offer a stylish and efficient solution.

Why Choose Wooden Magazine Storage Containers?
Wooden storage bins provide several advantages over other types of storage solutions. First, they add a touch of sophistication and warmth to any room, elevating the overall aesthetics of your space. Additionally, wood is a durable material that can withstand the test of time, ensuring that your magazine storage containers will last for years.
“Wooden magazine storage containers offer a stylish and efficient solution.”
The flexibility of wood also allows you to customize the size and design of your magazine storage containers to suit your specific needs. Whether you have a small collection of magazines or a large assortment of periodicals, you can create bins that perfectly accommodate your collection.
How to Make Magazine Storage Containers
Creating your own magazine storage containers is a straightforward process that requires basic woodworking skills and minimal tools. Here is a step-by-step guide:
- Measure and cut the plywood into the desired dimensions for the base and sides of your storage containers.
- Attach the sides to the base using wood glue and finish nails, ensuring a secure and sturdy construction.
- If desired, add dividers inside the storage containers to separate different categories of magazines.
- Sand the edges and surfaces of the containers to create a smooth finish.
- Apply a protective finish, such as varnish or wood stain, to enhance the appearance and durability of the containers.
Once your magazine storage containers are complete, you can arrange them on a bookshelf, coffee table, or any other suitable surface. Organize your magazines by topic, date, or any other system that works for you, and enjoy easy access to your reading materials whenever you desire.
Investing time in building magazine storage containers not only helps you stay organized but also allows you to showcase your woodworking skills and add a personal touch to your home decor. Start this beginner-friendly woodworking project today and transform the way you store and display your magazines and important papers.
Create a Sleek and Simple Coat and Hat Rack
If you're tired of dealing with entryway clutter, a sleek and simple coat and hat rack can be the perfect solution. With just a few basic woodworking tools and some lumber, you can create a functional and attractive storage solution for your coats and hats. Let's dive into the steps to create this beginner-friendly project.
Gather Your Materials and Tools
Before you begin, make sure you have the following materials and tools:
- Lumber: Choose a sturdy wood material that suits your style and complements your entryway.
- Coat Hooks: Select hooks that are not only functional but also aesthetically pleasing.
- Basic Woodworking Tools: These may include a saw, drill, screws, sandpaper, and paint or stain for finishing.
Measure and Cut the Lumber
Start by measuring the space where you plan to hang the coat and hat rack. Remember to account for the length and width of the lumber and the spacing between coat hooks.
Once you have the measurements, use a saw to cut the lumber into the desired lengths. You may want to consider adding decorative touches such as rounded edges or beveled edges to enhance the overall appearance of the rack.
Assemble the Rack
With the cut lumber, it's time to assemble the coat and hat rack. Lay the pieces flat on a work surface and position them according to your desired design.
Next, drill holes for the coat hooks, making sure they are evenly spaced and aligned. Use screws to secure the hooks to the lumber, ensuring they are tight and secure.
Finish the Rack
Once the coat and hat rack is assembled, sand the surface to smooth out any rough edges or imperfections. This step is crucial for achieving a professional and polished look.
You can then choose to paint or stain the rack to match your entryway decor. Consider using a clear coat finish to protect and enhance the natural beauty of the wood.
Mount the Rack
Finally, it's time to mount your coat and hat rack onto the wall. Locate the studs in your wall and use screws to attach the rack securely. Make sure it is level and stable before stepping back to admire your handiwork.
With your new coat and hat rack in place, you can say goodbye to entryway clutter and hello to a more organized space. Hang your coats, hats, scarves, and other accessories on the hooks, keeping them easily accessible and neatly displayed.
Remember, woodworking projects like this coat and hat rack not only provide practical solutions but also offer a sense of accomplishment and satisfaction. So grab your woodworking tools, get creative, and enjoy the process of bringing your DIY ideas to life!
Build a Spice Rack
If you're looking for a quick and fun beginner woodworking project, building a spice rack is a great choice. Not only will it add functionality to your kitchen, but it's also a chance to showcase your woodworking skills. This project is perfect for those with minimal experience and can easily fit inside a standard kitchen cabinet.
To get started, you'll need a few materials: wood discs, dowels, drill bits, and a wood ball or knob. These can be easily found at your local hardware store or online. The wood discs will form the shelves of the spice rack, providing ample space for your favorite spices. The dowels will serve as supports, ensuring stability and strength.
The first step is drilling holes into the wood discs to accommodate the dowels. Measure and mark the desired spacing between each hole to create a tiered spice rack. Using a drill bit appropriate for the size of the dowels, carefully drill the holes into the wood discs.
Next, it's time to assemble the spice rack. Apply wood glue to the ends of the dowels and insert them into the drilled holes, creating a sturdy structure. Allow the glue to dry completely before moving on to the next step.
Once the glue is dry, attach a wood ball or knob to the bottom of the spice rack. This will serve as a decorative element and also help with accessing the spices stored on the bottom shelf. Secure it with glue or screws, depending on the chosen method.
Finally, sand the entire spice rack to ensure a smooth finish. Pay attention to any rough edges or surfaces, as these can affect the overall appearance and functionality of the rack. Once sanded, you can choose to stain or paint the rack to match your kitchen decor.
Now that your spice rack is complete, it's time to find the perfect spot for it in your kitchen cabinet. Ensure it's easily accessible and visible to make selecting spices a breeze. With your spices neatly organized and within reach, cooking will become even more enjoyable.
To inspire you further, we've created a table that showcases the different materials and tools needed for this project:
| Materials | Tools |
|---|---|
| Wood discs | Drill |
| Dowels | Drill bit |
| Wood ball or knob | Sanding block |
| Wood glue | Paint or stain (optional) |
Building a spice rack not only adds functionality to your kitchen, but it also allows you to showcase your woodworking skills and creativity. So why not start this beginner-friendly project and bring organization and style to your kitchen cabinet?
Make a Simple Step Stool
A simple step stool is a great beginner woodworking project that can be completed in no time. By using a plate jointer and a jigsaw, you can create accurate joints for a sturdy step stool. This project also involves cutting half-circles in the risers for added design. The step stool can be customized to fit your needs and can be a useful addition to any room.
Materials Needed for the Simple Step Stool
- Wooden boards
- Plate jointer
- Jigsaw
- Wood glue
- Nails or screws
- Sanding tools
- Paint or finish
Instructions for Making the Simple Step Stool
- Measure and cut the wooden boards to the desired dimensions for the step stool. This will depend on your preferred height and width.
- Use the plate jointer to create accurate and strong joints between the boards. This will provide stability and ensure that the step stool can support weight.
- Use a jigsaw to cut half-circles in the risers of the step stool. This not only adds a decorative touch but also makes it easier to move the stool around.
- Assemble the step stool by applying wood glue to the joints and securing them with nails or screws. Make sure to follow the manufacturer's instructions for the specific type of glue or fasteners you are using.
- Once the glue has dried, sand the step stool to smooth out any rough edges or surfaces.
- Apply paint or finish to the step stool to protect the wood and enhance its appearance. Choose a color or finish that complements your existing decor.
- Allow the paint or finish to dry completely before using the step stool.
“A simple step stool is not only a practical addition to any room, but it also serves as a great woodworking project for beginners. By following these steps and using the right tools and materials, you can create a sturdy and stylish step stool that will come in handy for reaching high shelves or accessing hard-to-reach places.”
| Pros | Cons |
|---|---|
| Easy and quick project | Requires specific tools such as a plate jointer and jigsaw |
| Customizable to fit your needs | May require additional sanding or finishing work for a smooth surface |
| Functional and practical addition to any room |
Conclusion: Beginner Woodworking Project
Woodworking is a fantastic hobby for beginners, offering a creative outlet and the opportunity to learn valuable skills. With a wide variety of beginner-friendly projects available, you can start honing your woodworking abilities and crafting beautiful pieces in no time.
If you're new to woodworking, consider enrolling in beginner woodworking classes. These classes provide essential guidance and instruction, helping you understand the fundamentals and develop proper techniques. Learning from experienced instructors can accelerate your progress and give you the confidence to tackle more complex projects.
When starting out, it's important to remember a few beginner woodworking tips. Always prioritize safety by wearing protective gear and properly maintaining your tools. Begin with simple projects and gradually progress to more challenging ones as your skills improve. Don't hesitate to seek advice from seasoned woodworkers or join online communities to connect with fellow enthusiasts.
So, whether you're interested in constructing functional furniture or adding your personal touch to decorative items, woodworking for beginners offers endless possibilities. With patience, practice, and a passion for craftsmanship, you can embark on a fulfilling journey into the world of woodworking and create beautiful pieces to cherish for years to come.
FAQ
What are some easy woodworking projects for beginners?
Some easy woodworking projects for beginners include making a wooden chopping board and serving tray, building a shoe storage booster stool, creating magazine storage containers, building a coat and hat rack, making a spice rack, and building a simple step stool.
What tools and materials do I need for these beginner woodworking projects?
The tools and materials needed for these beginner woodworking projects vary, but they typically include common woodworking tools such as a saw, drill, and sander, as well as basic materials like wood, glue, and nails. Specific project requirements may vary, so be sure to check the individual project instructions for a comprehensive list of tools and materials needed.
Where can I find woodworking plans for these projects?
Woodworking plans for these projects can be found online. There are many websites and resources dedicated to providing free or paid woodworking plans for a variety of skill levels. Some popular websites for woodworking plans include Ana White, Woodsmith, and Wood Magazine.
How long does it take to complete these beginner woodworking projects?
The time it takes to complete these beginner woodworking projects varies depending on the complexity of the project, your skill level, and the amount of time you can dedicate to the project. Some projects, like making a chopping board or spice rack, can be completed in a few hours, while others, like building a coat and hat rack or step stool, may take a day or two to finish.
Do I need prior woodworking experience to tackle these projects?
While some basic woodworking skills and knowledge can be helpful, these projects are designed specifically for beginners and require minimal woodworking experience. Detailed instructions and diagrams are typically provided with the woodworking plans to guide you through each step of the process.
Can I customize these beginner woodworking projects to fit my specific needs?
Yes, it is possible to customize these beginner woodworking projects to fit your specific needs. For example, you can adjust the dimensions and design of the projects to match your space and personal style. However, keep in mind that making extensive modifications may require additional woodworking skills and tools.
Where can I find beginner woodworking classes to learn more about the craft?
Beginner woodworking classes can be found at local community colleges, trade schools, and woodworking studios. Online platforms also offer virtual woodworking classes that allow you to learn at your own pace from the comfort of your home. Research woodworking schools and websites to find classes that align with your skill level and interests.
What are some beginner woodworking tips for success?
Here are some beginner woodworking tips for success:
– Start with simple projects and gradually increase the complexity as your skills improve.
– Invest in quality tools and materials to ensure accurate and satisfying results.
– Take the time to properly measure and prepare your materials before starting a project.
– Follow the project instructions carefully and double-check your work as you go.
– Practice proper safety techniques, such as wearing protective gear and using tools correctly.
– Don't be afraid to make mistakes; learning from them is an essential part of the woodworking process.
