Rustic wood furniture plans can add a charming and cozy feel to any home. Whether you're a fan of warm, organic interiors or looking to upcycle and create unique pieces, DIY rustic furniture is the perfect project. In this article, we will guide you through the process of choosing materials and tools, designing your furniture, preparing the wood, assembling the furniture, and finishing and polishing your rustic creations.

Key Takeaways:
- DIY rustic furniture can bring a charming and cozy touch to your home decor.
- Choosing the right materials and tools is essential for successful woodworking projects.
- Design your furniture with simplicity and natural beauty in mind.
- Properly preparing the wood ensures precise and polished final results.
- Assembling the furniture requires careful alignment and secure fastening.
Choosing the Right Materials and Tools
When embarking on a DIY rustic furniture project, we understand the importance of choosing the right materials and tools. The selection of wood for your project will significantly influence the overall look and feel of your furniture. Opting for materials such as pine, oak, or reclaimed wood can provide distinct characteristics that enhance the rustic charm.
Having the appropriate tools on hand is equally crucial to ensure a successful and safe woodworking experience. Here are some essential tools you will need:
- Hand saw or circular saw: A reliable hand saw or circular saw will be your go-to for cutting the wood accurately and efficiently.
- Hammer and nails: These classics are essential for securing the wood pieces together.
- Sandpaper: Smooth out rough edges and create a polished finish with sandpaper of different grits.
- Safety glasses and gloves: Protect your eyes and hands while working with the tools and materials to ensure a safe working environment.
By investing in high-quality materials and reliable tools, you can confidently embark on your DIY rustic furniture project, knowing that you have everything you need for a successful outcome.
“Choose the right materials and tools for a successful DIY rustic furniture project.”
Designing Your DIY Rustic Furniture
Designing your own DIY rustic furniture allows you to showcase your personal style and create pieces that complement your home's aesthetic. Whether you're envisioning a charming coffee table, a rustic bookshelf, or a cozy dining table, the design process is where your creativity truly shines.
When it comes to rustic furniture, simplicity and natural beauty are key. Embrace the authenticity of the materials and aim for designs that capture the essence of rustic charm. The goal is to create furniture that seamlessly blends with your home's ambiance, adding warmth and character to any space.
Before starting the construction phase, it's essential to sketch your ideas and create a blueprint for your project. Incorporate the measurements for each piece of wood to ensure accuracy during assembly. This stage allows you to visualize the final product and make any necessary adjustments before cutting and shaping the wood.
Consider the following design aspects when creating your DIY rustic furniture:

- Functionality: Determine the purpose of the furniture piece and design accordingly. A coffee table should have enough surface area for drinks and decorations, while a bookshelf should accommodate your collection with ease. Keep in mind the practicality of the furniture in relation to its size and shape.
- Materials: Select the type of wood that best suits your design and desired aesthetic. Popular options for rustic furniture include pine, oak, and reclaimed wood. Each material has its own unique characteristics that contribute to the charm of the final piece.
- Proportions: Pay attention to the proportions of your design to ensure a visually balanced and harmonious result. Think about the space where the furniture will be placed and consider how its size and shape will interact with the surroundings.
- Details: Infuse your design with thoughtful details that enhance the rustic appeal. This could include decorative carvings, accents, or even distressed finishes that add to the overall charm and character of the furniture.
Rustic Coffee Table Design Example:
| Component | Dimensions |
|---|---|
| Tabletop | 48″ x 24″ |
| Legs | 16″ x 3″ x 3″ |
| Support Beams | 42″ x 2″ x 2″ |
Using these measurements as a starting point, you can customize the design to fit your space and personal style. Remember, the beauty of DIY rustic furniture lies in its handmade nature and the ability to tailor the design to your preferences.
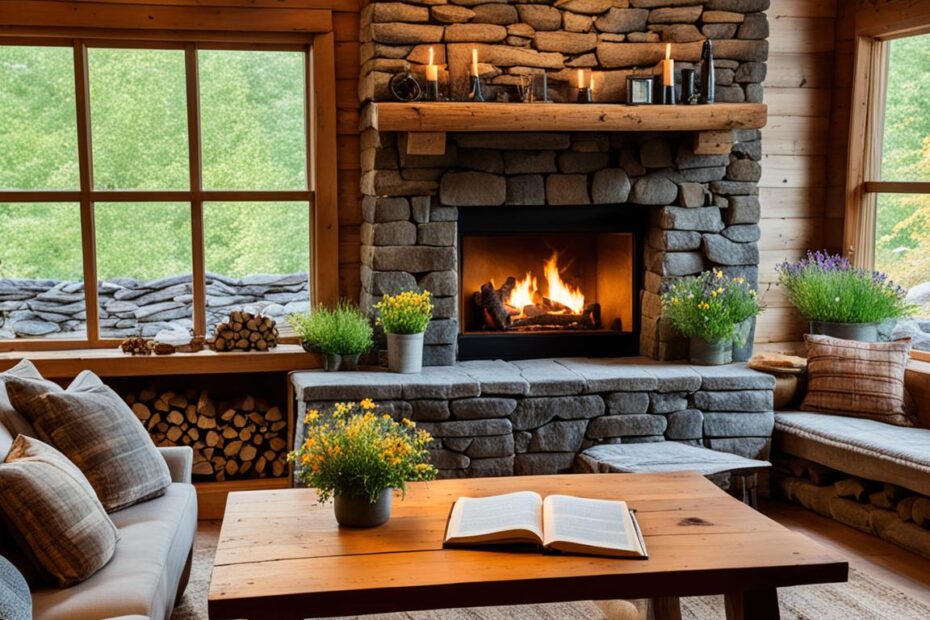
The image below showcases a rustic coffee table design that combines simplicity, natural beauty, and functionality:

By following these guidelines and allowing your creativity to flourish, you can create stunning DIY rustic furniture pieces that bring warmth and character to your home.
Preparing the Wood for Construction
Before we can start assembling your DIY rustic furniture, it's crucial to prepare the wood properly. This step ensures precise assembly and a polished finished product. Depending on the type of wood you choose – whether it's pine, oak, or reclaimed wood – there are a few essential processes:
- Cutting the Wood: Measure and cut the wood pieces to the appropriate dimensions based on your furniture plans. Use a hand saw or circular saw for accurate cuts. Take your time to ensure each piece is cut to the correct size, as this will affect the overall stability and appearance of your rustic furniture.
- Sanding the Wood: Smooth out any rough edges or imperfections by sanding the wood. This not only enhances the aesthetics of your furniture but also reduces the risk of splinters. Start with a coarse-grit sandpaper to remove any bumps or irregularities, and then gradually move to finer-grit sandpaper for a smooth finish.
Proper wood preparation is key to achieving a high-quality result. By carefully cutting and sanding the wood, you'll create a solid foundation for your rustic furniture construction.

Now that we have prepared the wood, it's time to move on to the exciting step of assembling your DIY rustic furniture. In the next section, we'll guide you through the process of aligning and securing the wood pieces to bring your furniture plans to life.
Assembling Your DIY Rustic Furniture
The next step in creating your DIY rustic furniture is the assembly process. This is where all your careful planning and preparation come together to bring your designs to life. Here's a guide on how to assemble your rustic furniture:
Step 1: Aligning Pieces
Begin by aligning all the wood pieces according to your design. This ensures that everything fits together properly and creates a visually pleasing result. Take your time to make sure each piece is in the correct position before moving on to the next step.
Step 2: Securing Pieces
With the pieces aligned, it's time to secure them together. There are a few options for this, depending on the type of rustic furniture you're assembling. Nails or screws are commonly used to hold the pieces together. Make sure to choose the appropriate size for your wood thickness to ensure a sturdy and cohesive final product.
“Properly aligning and securing each piece is essential for the stability and durability of your rustic furniture.”
Step 3: Quality Check
Once all the pieces are secured, double-check your work for accuracy. Ensure that everything is aligned correctly, and there are no loose or wobbly connections. Taking the time to perform a quality check will prevent any future issues and ensure the longevity of your furniture.
By following these steps, you can assemble your DIY rustic furniture with confidence, knowing that each piece is securely connected. Now, let's take a look at an example of how a rustic furniture assembly might come together:
| Wood Piece | Dimensions | Placement | Securing Method |
|---|---|---|---|
| 1 | 24″ x 18″ | Top | Screws |
| 2 | 12″ x 12″ | Legs | Nails |
| 3 | 36″ x 2″ | Support Beam | Screws |
| 4 | 24″ x 4″ | Shelf | Nails |
This table shows an example of the assembly details for a rustic coffee table. Each wood piece is listed with its dimensions, placement within the furniture, and the securing method used. This allows you to visualize how the different components come together to create the final product.
With your pieces aligned and secured, you're well on your way to completing your DIY rustic furniture project. In the next section, we'll cover the final step: finishing and polishing your furniture to enhance its beauty and longevity.
Finishing and Polishing Your Rustic Furniture
The finishing touches are essential in bringing your DIY rustic furniture to life. By applying the right techniques, you can transform your project into a polished masterpiece that showcases the natural beauty of wood. Follow these steps to achieve the perfect finishing for your rustic furniture:
- Sanding Surfaces: Start by sanding all the surfaces of your furniture. This process helps eliminate imperfections, rough edges, and any signs of previous treatments. By creating a smooth finish, you lay the foundation for an exceptional final look.
- Applying Finish: Once the surfaces are sanded, choose a finish that enhances the rustic aesthetic and protects the wood. Consider options such as paint, varnish, or wood stain based on your desired look. Apply the finish evenly and follow the instructions provided by the manufacturer to achieve optimal results.
- Polishing: The final step is to polish your rustic furniture to perfection. Use a soft cloth or a specialized furniture polish to bring out the natural shine of the wood. Take the time to highlight the craftsmanship and attention to detail, ensuring a professional and high-quality appearance.
By completing these finishing touches, you'll elevate your DIY rustic furniture to a whole new level. The sanding, application of finish, and polishing stages not only enhance the aesthetics but also protect the wood, ensuring longevity and durability for your creations.
Pro Tip:
When sanding surfaces, always work in the direction of the wood grain for the best results. This technique helps you achieve a smooth and consistent finish across your rustic furniture.
Now that you've learned the art of finishing and polishing, your rustic furniture is ready to become a focal point in your cozy home. Let's move on to exploring more DIY projects and expand our creative horizons!
Exploring More DIY Projects
If you've enjoyed creating DIY rustic furniture for your home, there are plenty of other exciting projects to explore. At Daisie's classes, we offer a wide range of hands-on workshops and tutorials that will inspire your creativity and enhance your home. Whether you want to revamp your decor, improve functionality, or add a personal touch, our DIY projects are perfect for home enhancement. Let your imagination run wild as you embark on these fulfilling and rewarding creative endeavors.
Discovering New DIY Ideas
Unleash your creativity by diving into our diverse selection of DIY projects. From transforming old furniture into unique pieces to crafting decorative items, you'll find endless possibilities for home improvement. Here are some of the exciting projects you can explore:
- Create your own customized wall art using various materials and techniques.
- Build stylish and functional storage solutions, such as shelves or organizers, to declutter your space.
- Design and construct unique lighting fixtures to add ambiance and personality to any room.
- Revive old or worn-out pieces of furniture with expert techniques like upholstery or painting.
- Construct outdoor furniture or garden decorations to create a cozy retreat in your backyard.
Benefits of DIY Projects
Engaging in DIY projects offers numerous benefits beyond just home enhancement. Here are a few reasons why DIY projects are worth exploring:
- Creative expression: DIY projects provide an opportunity to express your unique personal style and artistic vision.
- Cost-effective: By repurposing materials and doing the work yourself, you can save money compared to buying new items or hiring professionals.
- Sense of accomplishment: Completing a DIY project gives a sense of pride and achievement, knowing that you've created something with your own hands.
- Personalization: DIY projects allow you to customize your home decor to fit your tastes and preferences perfectly.
- Learning new skills: Engaging in DIY projects is an excellent way to learn new techniques and develop practical skills that can be applied to other areas of your life.
So why wait? Join us at Daisie's classes and let your DIY journey continue with exciting new projects that will enhance your home and showcase your creativity.
| Project | Description | Materials | Skills Required |
|---|---|---|---|
| Custom Wall Art | Create unique wall art using various materials, colors, and textures. | Canvas, paints, brushes, stencils, wood, fabric | Painting, stenciling, collage |
| DIY Shelving | Build custom shelving units to maximize storage and display space. | Wood, screws, brackets, drill | Measuring, cutting, assembly |
| Upcycled Lighting | Create unique lighting fixtures using repurposed materials. | Lamp kits, recycled objects, electrical components, wire cutters | Wiring, assembly |
| Furniture Makeover | Revive old furniture with paint, upholstery, or other creative techniques. | Paint, sandpaper, fabric, staples, glue | Refinishing, upholstery |
| Outdoor Decorations | Build outdoor furniture or create decorative elements for your garden or patio. | Wood, screws, outdoor paint, planters, pots | Carpentry, woodworking |
Conclusion
Creating your own DIY rustic furniture is a rewarding and fulfilling process. From choosing the right materials and tools to designing and constructing your pieces, each step allows you to infuse your personal style into your home. The warmth and charm of rustic wood furniture can transform any space into a cozy retreat, making it a perfect addition to your home decor.
By following the rustic wood furniture plans and engaging in DIY rustic furniture projects, you have the opportunity to create beautiful and personalized pieces that reflect your unique taste. Whether it's a coffee table, bookshelf, or dining table, your handmade furniture will add a touch of warmth and character to your cozy home.
Enjoy the process of bringing your designs to life and bask in the satisfaction of seeing the end result. With each piece of rustic furniture you create, you'll not only enhance the aesthetic appeal of your home but also showcase your creativity and craftsmanship. Embrace the DIY spirit and embark on the journey of creating your own rustic wood furniture for a cozy and inviting home.
FAQ
Can I use any type of wood for DIY rustic furniture?
Yes, you can use various types of wood such as pine, oak, or reclaimed wood to create rustic furniture pieces.
What tools do I need for DIY rustic furniture?
You will need tools such as a hand saw or circular saw, hammer and nails, sandpaper, safety glasses, and gloves for your woodworking projects.
How do I come up with a design for my DIY rustic furniture?
Consider the function of the furniture and aim for simplicity and natural beauty in your designs. Sketch your ideas and incorporate measurements for each piece of wood.
How do I prepare the wood for my DIY rustic furniture?
Depending on the type of wood you choose, such as pine, oak, or reclaimed wood, you'll need to cut the pieces to the appropriate dimensions and sand them to smooth out rough edges.
What is the process for assembling DIY rustic furniture?
Begin by aligning all the wood pieces according to your design and double-checking for accuracy before securing them together with nails or screws of the appropriate size.
What should I do to finish and polish my DIY rustic furniture?
Start by sanding all the surfaces to eliminate any imperfections and create a smooth finish. Then choose a finish, such as paint, varnish, or wood stain, that enhances the natural beauty of the wood. Finally, polish the piece to highlight the craftsmanship.
Are there other DIY projects I can explore beyond rustic furniture?
Yes, you can explore a wide range of DIY projects through Daisie's classes, workshops, and tutorials to continue enhancing your home and showcasing your creativity.
