Want to achieve that rustic, weathered look for your wood? Distressing wood has become a popular technique for creating a timeless, aged aesthetic.

From choosing the right wood to using various distressing techniques and tools, this step-by-step guide will help you achieve a truly authentic masterpiece.
Join us as we unravel the secrets of distressing wood for a rustic look.
Key Takeaways
- Reclaimed wood is a popular choice for distressing due to its authenticity and durability.
- Proper preparation of the wood surface, including thorough sanding and staining, is crucial for achieving a smooth and even distressed look.
- Distressing techniques like sanding, hammering, scratching, and burning can be used to replicate natural aging effects on the wood.
- Adding finishing touches such as darkening the wood with stain or paint, applying a glaze, and utilizing distressing techniques can greatly enhance the overall appearance of distressed wood.
Choosing the Right Wood
When distressing wood for a rustic look, selecting the appropriate type of wood is crucial to achieve the desired aesthetic effect. Different types of wood offer unique characteristics that can enhance the distressed appearance.
One popular choice is reclaimed wood, which is sourced from old buildings, barns, or other structures. The pros of using reclaimed wood for distressing include its authenticity and unique history, adding a sense of charm to the final product. Additionally, reclaimed wood is often more durable and stable than new wood, making it less likely to warp or crack.
However, there are cons to consider as well. Reclaimed wood can be more expensive and harder to source, and it may require additional preparation to remove nails or other remnants.
It is important to weigh these factors when choosing the right wood for distressing to ensure a successful outcome.

Preparing the Wood Surface
To achieve a smooth and even distressed finish, proper preparation of the wood surface is essential. Before you begin distressing the wood, it is important to ensure that the surface is clean and free of any dirt, dust, or debris.
Start by thoroughly sanding the wood using sandpaper with a grit appropriate for the type of wood you are working with. This will help to remove any imperfections, smooth out rough areas, and create a uniform surface for distressing. Pay attention to any knots or grain patterns, as these areas may require extra sanding to achieve a consistent look.
Once the sanding is complete, you can move on to staining the wood using your chosen staining method. This will add depth and color variation to the distressed finish, enhancing its rustic appeal.
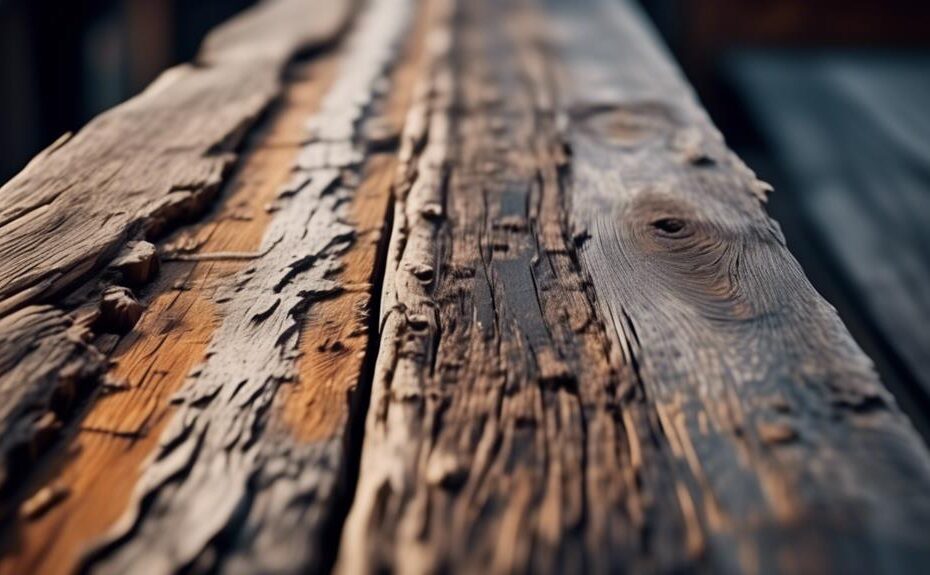
Distressing Techniques and Tools

There are several effective techniques and tools that can be utilized to distress wood and achieve a rustic appearance. The key is to replicate the natural aging effects that wood undergoes over time.
Here are four popular distressing methods and the tools required for each:
- Sanding: Sandpaper or sanding blocks with varying grits are used to create a worn and weathered look by removing layers of wood.
- Hammering: A hammer or mallet is used to create dents, dings, and indentations on the surface of the wood.
- Scratching: Sharp objects like nails, keys, or wire brushes are used to create scratches and gouges, mimicking the wear and tear of everyday use.
- Burning: A propane torch or heat gun can be used to scorch the wood, creating darker areas and giving it an aged look.
Finishing Touches for an Authentic Rustic Look
For an authentic rustic look, it is essential to pay attention to the finishing touches, as they can greatly enhance the overall appearance of distressed wood.
To achieve a truly weathered appearance, there are several aging methods that can be applied. One popular technique is the use of stain or paint to darken the wood, giving it a more aged and worn look.
Another method is the application of a glaze, which adds depth and dimension to the wood, mimicking the effects of time and weather.
Additionally, distressing techniques such as sanding, scraping, and denting can be used to create worn edges and imperfections, further enhancing the rustic charm.
Finally, adding a protective layer of wax or varnish can help preserve the wood and give it a polished yet rustic finish.
Frequently Asked Questions
Can I Distress Any Type of Wood, or Are There Certain Types That Work Better for Achieving a Rustic Look?
Different types of wood can be distressed to achieve a rustic look, although some may work better than others. It is important to consider the characteristics of each wood type and choose appropriate distressing tools for optimal results.
Do I Need to Remove Any Existing Finish or Paint From the Wood Before Distressing It?
When distressing wood without removing an existing finish, it is important to assess the condition of the wood and the desired level of distressing. Unconventional tools such as chains, hammers, and wire brushes can be used to achieve the desired rustic look.
Can I Use Household Items as Distressing Tools, or Do I Need Specific Tools for the Job?
Using household items for distressing wood can be a cost-effective and creative approach. While specific tools may yield more precise results, achieving a realistic distressed look without them is possible with careful techniques and patience.
Is It Possible to Distress Wood Without Using Any Chemicals or Stains?
Distressing wood using natural techniques is possible without the use of chemicals or stains. By employing unconventional materials such as sandpaper, wire brushes, or even vinegar and steel wool, one can achieve a rustic look on wood surfaces.
How Long Does It Typically Take to Complete the Distressing Process on a Piece of Wood?
The distressing process on wood can vary in duration depending on factors such as the desired level of distressing and the techniques used. However, there are tips and techniques available to help speed up the process and achieve different levels of distressing.
Conclusion
In conclusion, distressing wood for a rustic look requires careful selection of the right type of wood, thorough preparation of the wood surface, and the use of appropriate distressing techniques and tools.
By following these steps and adding finishing touches, an authentic rustic look can be achieved.
Just like an artist skillfully working with a brush on a canvas, distressing wood with precision and knowledge can transform it into a beautifully aged masterpiece.
