Looking to enhance your outdoor experience? Look no further than our comprehensive guide on building the perfect picnic table.

Whether it's a family gathering or a casual get-together with friends, a well-crafted picnic table can provide the ideal setting for memorable moments.
We'll provide you with all the materials, tools, step-by-step instructions, and finishing touches you need to create your own masterpiece.
So, let's dive right in and elevate your outdoor experience with a custom picnic table.
Key Takeaways
- Hardwood, such as oak or teak, is the preferred material for building picnic tables due to its durability, resistance to rot, decay, and insect damage.
- Hardwood offers natural beauty and elegance, enhancing the overall appearance of the picnic table, unlike softwood or plastic alternatives.
- Choosing the right material is crucial for achieving a sturdy and visually pleasing final product that will stand the test of time.
- Safety precautions and the use of precise tools are essential for a successful woodworking project.
Materials Needed
To successfully complete the picnic table woodworking project, you will need a specific set of materials that are essential for achieving a sturdy and aesthetically pleasing final product.
When it comes to picnic tables, hardwood is the preferred material due to its durability and longevity. Hardwood, such as oak or teak, offers numerous advantages over other materials. It is resistant to rot, decay, and insect damage, making it perfect for outdoor use. Additionally, hardwood has a natural beauty and elegance that enhances the overall appearance of the picnic table.
While there are alternative materials available, such as softwood or plastic, they often lack the strength and aesthetic appeal that hardwood provides. Therefore, for a picnic table that will stand the test of time and impress with its visual appeal, hardwood is the ideal choice.

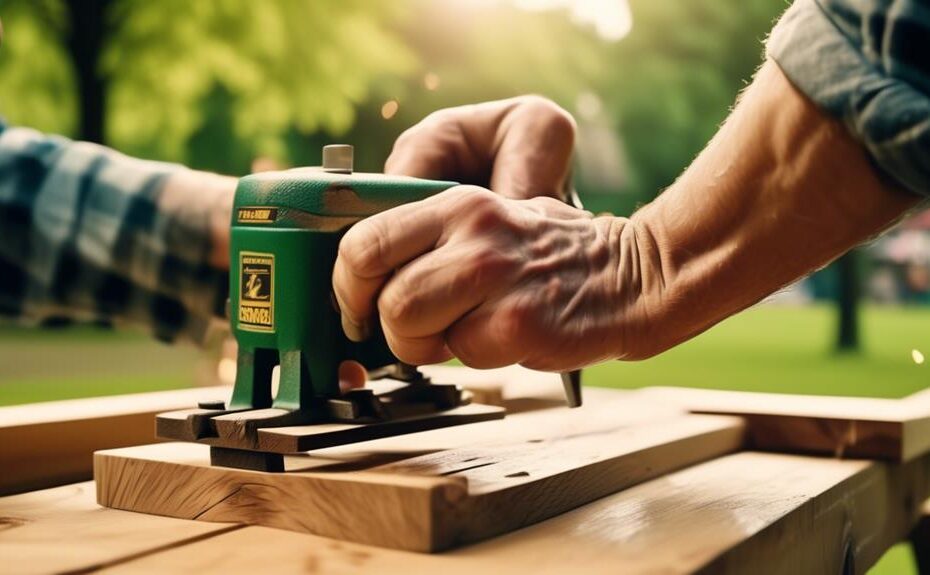
Tools Required
When undertaking the picnic table woodworking project, a variety of tools are necessary to ensure accurate and efficient construction. Here are three essential woodworking tools that you will need:
- Safety Precautions: Before diving into any woodworking project, it is essential to prioritize safety. Equip yourself with safety goggles, ear protection, and a dust mask to protect your eyes, ears, and lungs from potential hazards.
- Measuring and Marking Tools: Accurate measurements are crucial for a successful picnic table project. Invest in a tape measure, combination square, and marking gauge to ensure precise cuts and joinery.
- Cutting and Shaping Tools: To cut and shape the wood, you will need a high-quality handsaw or circular saw, a chisel set for precise detailing, and a router for creating decorative edges.
Step-By-Step Instructions

Begin by selecting the type of wood you will use for your picnic table, ensuring that it is durable and suitable for outdoor use. Once you have chosen the wood, follow these step-by-step instructions to successfully build your picnic table.
- Measure and cut the wood according to the dimensions specified in the woodworking plans.
- Sand the cut pieces to smooth any rough edges and ensure a clean finish.
- Assemble the table legs and attach them securely to the tabletop using screws or bolts.
- Install the benches by attaching them to the table legs.
- Apply a weather-resistant finish to protect the wood from the elements.
- Finally, conduct a thorough inspection to ensure all connections are secure and the table is stable.
During the woodworking process, it is crucial to follow safety precautions such as wearing protective goggles, gloves, and ear protection. Additionally, be mindful of common mistakes like not double-checking measurements, rushing the assembly, or using incorrect tools.
Finishing Touches
Now that you have successfully assembled the picnic table, it is time to add the finishing touches to enhance its durability and aesthetic appeal. These final steps will ensure that your outdoor picnic table stands the test of time and looks beautiful in your backyard. Here are three essential finishing touches to consider:
- Outdoor picnic table decorations: Consider adding decorative elements such as a colorful tablecloth, floral centerpieces, or even string lights to create a festive atmosphere. These small touches can elevate the overall look and make your picnic table a focal point of your outdoor space.
- Choosing the right picnic table stain: Selecting the appropriate stain is crucial for protecting the wood from weather damage. Look for a stain that is specifically designed for outdoor use, offers UV protection, and is resistant to moisture and mildew. This will ensure that your picnic table remains in great condition for years to come.
- Applying a protective sealant: After staining the picnic table, it is essential to apply a protective sealant. This will help prevent water damage, warping, and discoloration. Choose a sealant that is suitable for outdoor use and follow the manufacturer's instructions for application.
Frequently Asked Questions
How Long Does It Take to Build a Picnic Table Using These Woodworking Plans?
When building a picnic table, the time required depends on various factors such as skill level, tools available, and the complexity of the plans. However, it is important to first consider the type of wood and proper staining and sealing techniques for long-lasting protection.
Can I Customize the Dimensions of the Picnic Table According to My Specific Needs?
Yes, the picnic table woodworking plans offer customization options, allowing you to adjust the dimensions according to your specific needs. This allows you to create the ideal dimensions for your desired picnic table.
Are There Any Additional Safety Precautions I Should Be Aware of When Working With Wood and Power Tools?
When working with wood and power tools, it is crucial to prioritize safety. Woodworking safety tips include wearing protective gear such as safety glasses, gloves, and earplugs, as well as maintaining a clean and organized workspace to minimize accidents.
Can I Use Treated Lumber for the Construction of the Picnic Table to Make It More Durable?
Using treated lumber for picnic table construction has pros and cons. It provides increased durability and resistance to decay, but may contain chemicals harmful to humans and the environment. Proper maintenance includes regular cleaning and sealing to prolong its lifespan.
Are There Any Alternative Materials That Can Be Used Instead of Wood for Building a Picnic Table?
When considering alternative materials for building a picnic table, it is important to take durability into account. While wood is commonly used, options such as metal, plastic, or composite materials may offer increased longevity and require less maintenance.
Conclusion
In conclusion, the picnic table woodworking plans provide a comprehensive guide for creating a beautiful and functional picnic table. By following the step-by-step instructions, using the necessary materials and tools, and adding finishing touches, one can achieve a high-quality result.
The detailed and precise style of writing allows for a clear understanding of the process, while the imagery adds depth and complexity to the overall experience of building a picnic table.
