Woodworking enthusiasts can elevate their skills and craftsmanship with the help of expert tips and proven techniques. In this article, we will explore valuable insights and advice to master popular woodworking. From taming awkward plywood sheets to mastering dadoes and rabbets, we will provide you with practical knowledge to enhance your woodworking projects. Join us on this journey!

Key Takeaways:
- Learn essential tips for working alone with plywood.
- Discover the art of creating tight and precise corner joints with dadoes and rabbets.
- Maximize the potential of your drum sander to achieve flawless surfaces.
- Master the process of creating flawless countersinks for perfect pilot holes.
- Invest in essential woodworking tools to enhance your projects.
Essential Tips for Working Alone with Plywood
Working with plywood alone can present unique challenges that require careful consideration and proper techniques. In this section, we will provide you with essential tips to make your woodworking experience with plywood sheets more efficient and enjoyable. By mastering these techniques, you'll be able to handle and tame awkward and heavy plywood sheets with ease, ensuring successful woodworking projects.
When working alone, it's crucial to prioritize safety and efficiency. Here are some valuable tips to guide you:
- Plan your workspace: Create a clean and organized workspace that allows easy access to your tools and materials. Clear any obstructions and ensure sufficient lighting for optimum visibility.
- Use proper lifting techniques: Plywood sheets can be heavy and cumbersome. To prevent injury, remember to bend your knees, keep your back straight, and lift with your legs. Additionally, utilize lifting aids or ask for assistance when necessary.
- Utilize support: Plywood sheets tend to sag and bow under their weight. Use sawhorses, workbenches, or improvised supports to raise and stabilize the plywood, providing a flat working surface.
- Secure the plywood: Use clamps or temporary fasteners to secure the plywood sheets in place. This will prevent unwanted movement or shifting during cutting or assembling.
- Make precise measurements: Accurate measurements are vital for successful woodworking projects. Double-check your measurements before cutting the plywood to avoid waste and ensure precise fits.
Working alone provides a unique serenity that allows you to fully immerse yourself in the art of woodworking. By implementing these tips, you'll be able to navigate the challenges of working with plywood sheets and achieve professional results.
“Working alone in the shop gives me a sense of connection with the wood, and it allows me to focus on bringing my ideas to life.” – Evan Smith, Master Woodworker
Mastering Dadoes and Rabbets – Corner Joints Made Easy
Dadoes and rabbets are essential cabinetmaking joints that can elevate the strength and versatility of your woodworking projects. In this section, we will guide you through the art of creating tight and precise corner joints using dadoes and rabbets. Mastering these joints will enable you to construct sturdy cabinet carcasses, drawer boxes, and other woodworking components with ease.
Exploring Dadoes and Rabbets
Dadoes are wide, square-edged channels that are cut across the grain of a board. They create a recessed groove that provides a secure fit for shelves, dividers, or other components. On the other hand, rabbets are simple, L-shaped recesses cut along the edge or end of a board, allowing it to overlap and fit snugly with another piece.
Both dadoes and rabbets can be created with various woodworking techniques, including hand tools and power tools. The choice of technique depends on the complexity of your project and your personal preferences. However, regardless of the method used, the key to mastering these joints lies in precision and attention to detail.
Techniques for Creating Dadoes and Rabbets
Here are some commonly used techniques for creating dadoes and rabbets:

- Using a Dado Blade: A dado blade set on a table saw allows you to quickly and accurately cut dadoes of varying widths. However, be sure to make multiple passes to achieve the desired depth and avoid overloading the motor.
- Using a Router: A router equipped with a straight bit and a dado guide can efficiently cut dadoes and rabbets. Ensure that the guide is firmly attached and properly aligned to achieve precise and consistent results.
- Using a Chisel and Mallet: For those who prefer traditional woodworking techniques, a chisel and mallet can be used to carefully and accurately remove wood to create dadoes and rabbets.
Whichever technique you choose, it's important to practice on scrap wood before moving on to your actual project. This will allow you to refine your skills and make any necessary adjustments to achieve the perfect fit.
Tips for Perfect Corner Joints
“A perfectly executed dado or rabbet joint creates not only a strong and durable connection but also adds a touch of craftsmanship to your woodworking projects.” – Woodworking Expert, Robert Johnson
Here are some expert tips to achieve perfect corner joints:
- Measure Accurately: Take precise measurements to ensure that the depth, width, and location of your dadoes and rabbets are consistent across all pieces.
- Use a Test Piece: Before cutting into your project materials, it's wise to make a test piece with the same dimensions to verify the fit of your joints.
- Stay Organized: Label your pieces and mark corresponding locations for dadoes and rabbets to avoid confusion during assembly.
- Ensure a Snug Fit: Aim for a tight fit between the dadoes and rabbets, avoiding excessive gaps that compromise the joint's strength.
- Glue and Clamp: Apply glue evenly along the joint surfaces and use clamps to firmly secure the pieces together while the glue dries.
By following these techniques and tips, you will be well on your way to mastering dadoes and rabbets, adding a professional touch to your woodworking projects.

Comparing Dadoes and Rabbets
| Aspect | Dadoes | Rabbets |
|---|---|---|
| Common Applications | Shelves, dividers, cabinet backs | Glass panels, cabinet backs, drawer bottoms |
| Joinery Strength | Excellent load-bearing capabilities | Good for light to medium loads |
| Appearance | Hidden or partially exposed | Proudly visible from the outside |
| Versatility | Offers flexibility for adjustable shelves or inserts | Allows overlapping joints for added strength |
Understanding the differences between dadoes and rabbets can help you select the appropriate joint for your specific woodworking needs, ensuring both functionality and aesthetic appeal.
Now that you have obtained the knowledge and techniques to master dadoes and rabbets, you can confidently incorporate these cabinetmaking joints into your woodworking projects, creating strong and beautiful corner connections.
Unlocking the Potential of a Drum Sander
Maximize the potential of your drum sander with these valuable tips and tricks. Discover how to eliminate laborious hand scraping of dried glue and take your glue-ups directly to the drum sander. We'll also explore techniques for maximizing the efficiency of your drum sander, ensuring smooth and flawless surfaces for your woodworking projects. Say goodbye to tedious hand sanding and unlock the true potential of your drum sander.

When it comes to woodworking projects, achieving smooth and even surfaces is crucial to the final outcome. That's where a drum sander can make all the difference. With its rotating drum and abrasive surface, a drum sander can quickly and effectively remove material, saving you time and effort. Let's dive into some tips and techniques to unlock the full potential of this powerful tool.
Eliminating Glue Scrape Offs
If you've ever tackled glue-ups, you know how difficult it can be to remove dried glue residue from your wooden surfaces. Traditional scraping and sanding methods can be time-consuming and may not yield the desired results. However, a drum sander can be a game-changer in this scenario. By taking your glue-ups directly to the drum sander, you can effortlessly remove excess glue and achieve a smooth surface in no time. Just make sure to scrape off any big glue blobs before sending your project through the drum sander to avoid unnecessary wear on the sandpaper.
Maximizing Efficiency
To get the most out of your drum sander, it's essential to consider a few key factors that can enhance its efficiency:
- Feed Rate: Experiment with different feed rates to find the optimal speed for each project. Too fast, and you may not achieve a smooth surface; too slow, and you risk burning the wood.
- Multiple Passes: When sanding thicker materials, it's usually best to make multiple passes, gradually reducing the drum's depth of cut. This approach ensures a more even sanding and minimizes the risk of burning or sanding through the material.
- Infeed and Outfeed Support: Providing proper support at the infeed and outfeed ends of the drum sander can prevent snipe and reduce the chances of damaging your workpieces during the sanding process. Use roller stands or additional workbenches to support long or heavy boards.
By optimizing your drum sander's efficiency, you'll be able to tackle various woodworking projects with ease, saving time and achieving professional results.
Smooth Sanding Techniques
While drum sanders are known for their effectiveness in material removal, they can also deliver smoothly sanded surfaces when used correctly. Here are a few techniques to help you achieve exceptional results:
- Start with a Coarser Grit: Begin sanding with a coarser grit to remove any imperfections or rough spots. As you progress, gradually switch to finer grits for a smoother finish.
- Sanding Parallel to the Grain: To avoid cross-grain scratches, sand parallel to the wood grain. This technique ensures an even surface and minimizes the risk of creating visible sanding marks.
- Avoid Excessive Pressure: Let the drum sander do the work. Applying excessive pressure can lead to uneven sanding and may overload the motor or cause damage to the sanding drum. Instead, opt for a consistent, gentle feed rate.
By mastering these sanding techniques, you can achieve pristine surfaces with your drum sander, giving your woodworking projects a professional touch.
A drum sander is a versatile tool that can save time and effort in your woodworking projects. By following these tips and incorporating smart sanding techniques, you can unlock the true potential of your drum sander and achieve exceptional results.” – Woodworking Pro
| Benefits of a Drum Sander | Drawbacks of a Drum Sander |
|---|---|
| Efficient material removal | Expensive initial investment |
| Smooth and even surfaces | Requires space due to its size |
| Time-saving compared to manual sanding | May not be suitable for small or delicate pieces |
Mastering Countersinks – Perfect Preparations for Pilot Holes
In the world of woodworking, attention to detail is key to achieving professional-quality results. One often overlooked but crucial step is countersinking, which ensures a perfect fit for screws and other fasteners. By creating clean and precise countersinks, you can prevent splitting and ensure a seamless finish.
Countersinking involves creating a conical recess in the material's surface so that the screw head sits flush with or slightly below the surface. This not only enhances the visual appeal of your project but also provides a secure and stable connection.
When it comes to countersinking, one important consideration is the size of the countersink bit. You'll want to use a bit that matches the screw you'll be using. A common mistake is using a bit that's too big, resulting in a loose fit. On the other hand, using a bit that's too small can cause the material to split.
To ensure accurate countersinks, follow these steps:
- Step 1: Mark the location: Determine where the screw will be placed and mark the spot with a pencil or a fine-point marker. This will serve as your guide during the countersinking process.
- Step 2: Choose the right bit: Select a countersink bit that matches the diameter of your screw. Make sure the bit is securely attached to your drill or driver.
- Step 3: Set the depth: Adjust the depth stop on your drill or driver to control the depth of the countersink. This will ensure that the screw sits perfectly flush with the material's surface.
- Step 4: Create the countersink: Position the drill or driver over the marked spot and slowly apply pressure to create the countersink. Maintain a steady hand and let the tool do the work for you.
After countersinking, it's essential to drill pilot holes to prevent the wood from splitting when inserting screws. Pilot holes are smaller holes drilled into the material before driving the screw. They allow the screw to slide in smoothly, reducing the risk of damaging the wood fibers.
Here's how to drill pilot holes:
- Step 1: Select the right drill bit: Choose a drill bit that matches the diameter of your screw, typically slightly smaller than the screw's outer diameter.
- Step 2: Mark the depth: Use tape or a depth stop on your drill bit to mark the desired depth of the pilot hole.
- Step 3: Drill the pilot hole: Position the drill bit over the marked spot and apply steady pressure. Drill the hole to the desired depth, being careful not to go too deep.
By following these steps and mastering the art of countersinking and pilot holes, you'll ensure a secure and professional finish for your woodworking projects.
Remember, attention to detail is crucial in woodworking. Take the time to master these techniques, and you'll elevate the quality of your projects while avoiding costly mistakes.
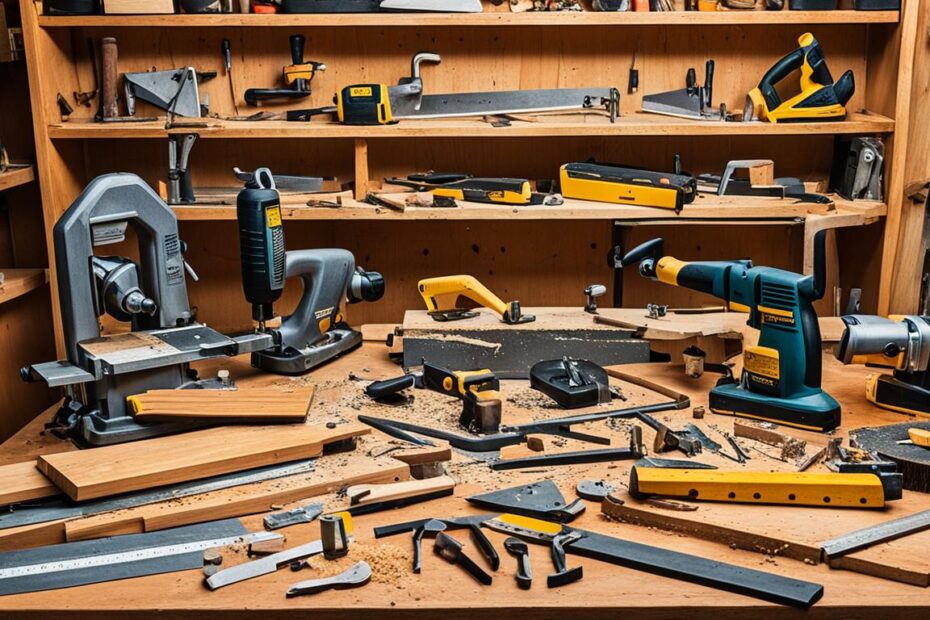
Essential Woodworking Tools and Their Worth
As woodworkers, having the right tools can make all the difference in the success and quality of our projects. In this section, we'll introduce you to a selection of essential woodworking tools that are worth every penny. These tools will not only enhance your woodworking experience but also enable you to tackle a wide range of projects with confidence and precision.
Squares
One of the most fundamental tools in a woodworker's arsenal is a square. From checking for 90-degree angles to ensuring accurate measurements, a high-quality square is essential for achieving precise and professional results. Look for options like the Swanson Tool Speed Square or the classic Stanley Quick Square, which offer durability and reliability.
Block Planes
A block plane is a versatile tool that allows you to quickly and easily shape and smooth small pieces of wood. It's perfect for chamfering edges, fine-tuning joints, and removing rough spots. Consider investing in a reliable block plane like the Stanley Sweetheart Block Plane for excellent control and comfortable use.
Palm Routers
When it comes to adding decorative flair and intricate details to your woodworking projects, a palm router is an invaluable tool. Its compact size and ease of use make it ideal for shaping edges, creating grooves, and cutting patterns. Look for options like the Bosch Colt Palm Router or the DeWalt DWP611PK Compact Router for precise and efficient routing.
Special Saws
Woodworking often calls for a variety of cuts, which is where specialized saws come into play. A versatile handsaw like the Irwin Jack Universal Handsaw is perfect for accurately cutting through different wood species, while a Japanese pull saw such as the Gyokucho Razorsaw Dozuki Saw offers unmatched precision for delicate joinery work.
“Investing in high-quality tools is an investment in your craft. They not only save time and effort but also elevate the quality and precision of your woodworking projects.”
By equipping yourself with these essential woodworking tools, you'll be well-prepared to take on a wide range of projects and achieve outstanding results. Remember, it's important to choose tools that suit your specific needs and preferences. Quality, durability, and comfort are key factors to consider when making your selection.
Now, let's take a moment to appreciate the visual beauty of these tools:
| Stanley Quick Square | Swanson Tool Speed Square |
| Stanley Sweetheart Block Plane | Bosch Colt Palm Router |
| DeWalt DWP611PK Compact Router | Irwin Jack Universal Handsaw |
| Gyokucho Razorsaw Dozuki Saw |
Investing in high-quality tools is an investment in your craft. They not only save time and effort but also elevate the quality and precision of your woodworking projects. With these essential tools at your disposal, you'll be ready to embark on woodworking projects of any scale and complexity, bringing your creative vision to life.
Conclusion
Now that you've reached the end of this journey to master popular woodworking, you have gained a wealth of knowledge and practical tips to enhance your craftsmanship. By implementing the woodworking techniques shared in this article, you are well-equipped to take your woodworking projects to new heights.
Remember, safety and attention to detail are paramount in woodworking. Whether you're taming awkward plywood sheets, mastering dadoes and rabbets, unlocking the potential of a drum sander, perfecting countersinks, or using essential woodworking tools, always prioritize precision and workmanship.
As you continue your woodworking endeavors, keep honing your skills and exploring new projects. Embrace the joy of creating beautiful and functional pieces through woodworking. Stay inspired and never stop learning. The world of woodworking is vast, and there is always room for growth and improvement.
Thank you for joining us on this woodworking journey. Now, go forward, unleash your creativity, and let your woodworking skills shine.
FAQ
What are some useful tips and tricks for popular woodworking?
Popular woodworking can be enhanced with expert tips and proven techniques. From taming awkward plywood sheets to mastering dadoes and rabbets, there are various practical knowledge and insights that can elevate your woodworking projects.
How can I work alone with plywood more efficiently?
Working alone with plywood can be challenging, but there are essential tips to make the process easier. Learn how to handle and tame awkward and heavy plywood sheets, ensuring a smooth and successful woodworking experience. Discover techniques for working safely and effectively on your own.
What are dadoes and rabbets, and how can I master them in woodworking?
Dadoes and rabbets are commonly used joints in cabinetmaking. By diving deep into the art of creating tight and precise corner joints, you can explore the versatility and strength of these joints. Learn how to master them for your woodworking projects, from cabinet carcasses to drawer boxes.
How can I unlock the potential of my drum sander in woodworking projects?
Maximize the potential of your drum sander with valuable tips and tricks. Discover how to eliminate laborious hand scraping of dried glue by taking your glue-ups directly to the drum sander. Explore techniques for maximizing the efficiency of your drum sander, ensuring smooth and flawless surfaces for your woodworking projects.
What are countersinks, and why are they important in woodworking?
Countersinking is a crucial step in woodworking that ensures a perfect fit for screws and other fasteners. Learn how to create flawless countersinks and understand the importance of drilling pilot holes after countersinking. By following these steps in the correct order, you can achieve professional results and avoid common pitfalls in your woodworking projects.
What are some essential woodworking tools worth investing in?
Every woodworker needs a set of essential tools to tackle various woodworking projects. From squares and block planes to palm routers and special saws, these tools can enhance your woodworking experience and enable you to create stunning and functional pieces.
